The Gigabot Project
|
 |
Building up an inexpensive high resolution panoramic robot from LEGO
NXT® parts
Part 1: Building and assembly
Shopping List:
- a camera with a tele lens, cable release (something
cabled where you can press a button) and a solid tripod
- LEGO NXT®
controller unit, 2 motors and some Lego technic®
bricks
- Panoramic head (can be self made), single-row or
multi-row
- a large disk, wooden, metal or pastic, whatever you have
- nylon string
- 2 adapter screws from your local camera shop (see below)
- Some DIY-parts and tools
|
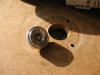
| The central part of the robot is a large disk where
the motor will travel around. This disk doesn't necessarily have
to be built with high precision. The diameter of the disk should
be chosen as large as possible but smaller than the "arm"
of your panorama head (watch the photos to see why). |
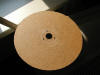 |
The important feature of the disk is a notch
that will act as a guide for the nylon string that will later
span around the disk. In my case, I have used 3 thin plywood
pieces left over from some broken photo frames.
The radius of the middle disk is a few millimeters smaller than
the outer ones. This notch is half-filled with some heat bonding
plastic, so our string can neither slip nor slump. |
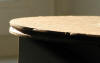 |
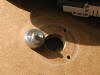
To be able to firmly mount disk and head on the
tripod, I bought an adapter screw from a local camera
shop. This adapter screw sits in between tripod mount and
panohead.
The thickness of the disk is chosen a few 1/10th millimeters
less than the "thickness" of the adapter screw. This will
squeeze the disk between tripod and panohead and therefore
provide a self-fastening mount for the disk. |
 |
 |
 |
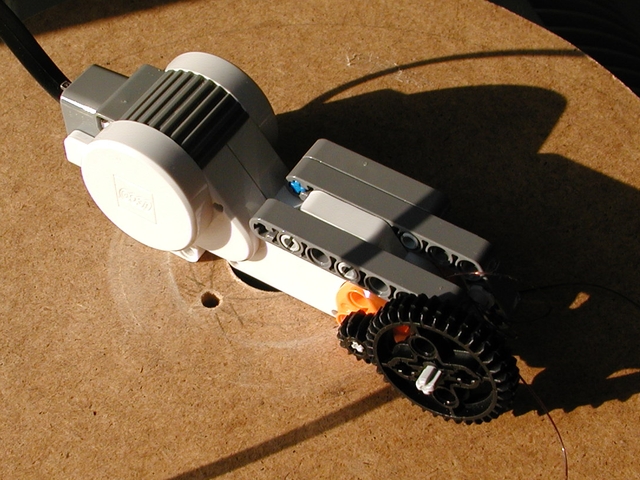
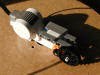
Now we can start building the actuator
responsible for rotating the panohead. On the right you can see
this motor with some sort of simple gear to reduce speed and
increase accurateness.
Wrap the nylon string around the axle several times and knot
both ends together to build a loop that you can later wrap
around our disk.
See detailed building instructions for
the "motor" part. |
 |
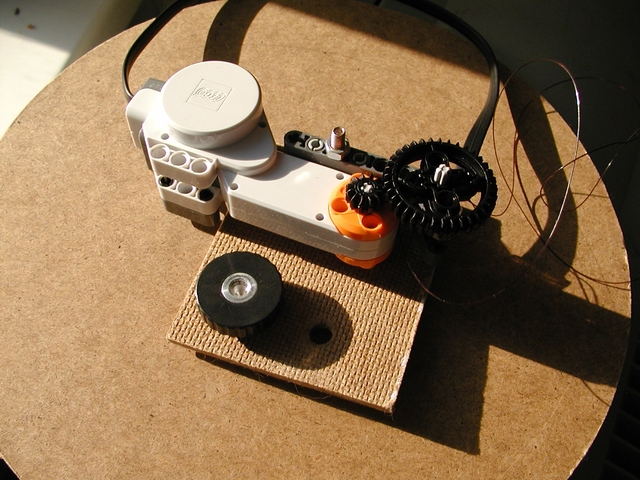
To be able to fasten the motor on the arm of the
panohead, I bought a second adapter screw (with a little longer
thread than the first one). A small piece of plywood acts as a
mounting plate, holding the motor as well as the adapter screw.
As you can see, I used another simple screw to fasten the motor
on this plate.
Ensure that the axle with the nylon string will later align with
the notch of the disk, otherwise the string will tend to slip
off. |
 |
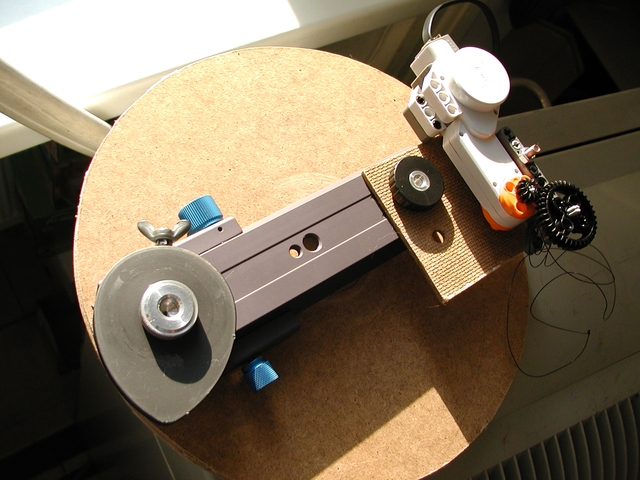
| Now we can attach the mounting plate on the arm
of the panohead. |
 |
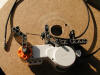
Now we have to actuate the cable release. This
is the task of the second motor. Build a fixture for the cable
and use the motor with an attached LEGO brick to press the
button.
See detailed building instructions for
the "shutter" part. |
 |
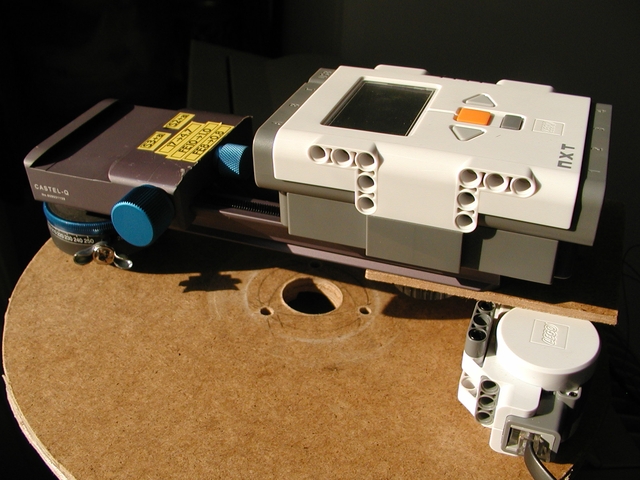
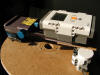
The panohead I'm using is big enough to simply
pile the NXT controller on its arm. To prevent the controller
slipping off, I use some detachable DIY gum.
You are free to use adhesive tape or an even more professional
solution... |
 |
You may now attach the shutter to the controller
brick...
See detailed instructions on assembling
the robot and the panohead. |
 |
| Seen from the bottom... |
 |
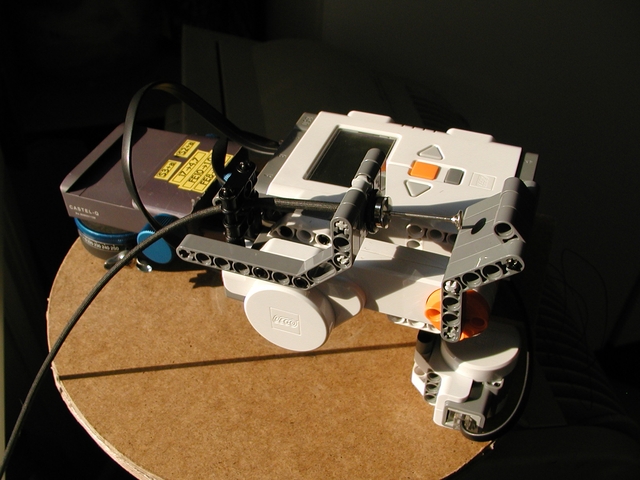
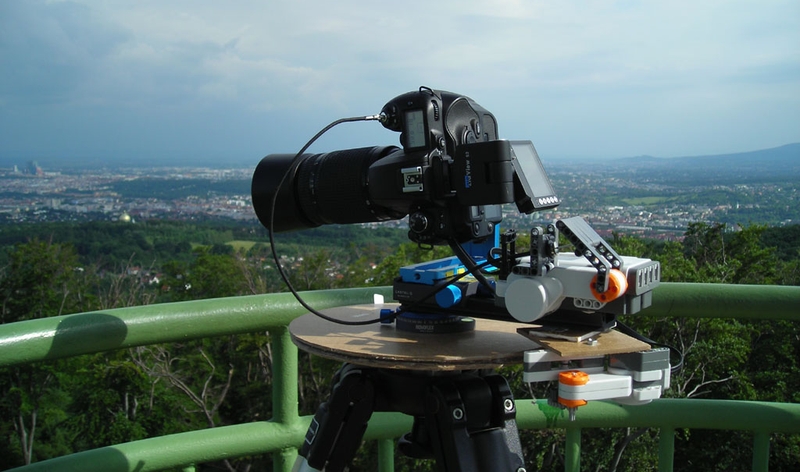
| That's all folks. We are finished. If you don't
have 2 left hands, you should end up with something like this: |
Part 2: programming the robot
I assume you are familiar with the NXT-G programming environment
(that's the one delivered with the NXT®
Robot), so I'm including only basic instructions.
This is Version 2 beta:
-
You can either download the
Compiled Binary or
the Source Files.
Binary: Ver. 0.3c (older
Ver. 0.2.b)
Source: Ver. 0.2b
-
Open the readme in the zip
file. It contains the instructions how to install und use the software.
-
For your convenience, here's a copy of the included
"operation manual":
Usage:
------
The robot assumes you are working from left to right: Right
button should move the view to the right, left button vice
versa.
First step: Define the left and right border of your panorama
Second step: Define the FOV. This is done by learning the robot
the angle between 2 shots.
The angle can be defined at any position inside the panorama's
FOV limits.
Third step: Shoot a single row.
If you experience any problems, you can press the "enter"
(orange) button.
The robot will stop and ask you to either:
- continue shooting
- go back to repeat last shot (you can go back more than one
shot if you like)
Fourth step:
Tilt the camera and repeat the row. |
Feedback, questions?
Please mail me at
salzamt@dativ.at
|