How to create a video from a panoramic image
Part three: Animation definition and rendering
A few words to animation "newbies": You can get lost quickly of
you have no plan what you are doing. Make a small timetable and
storyboard and use it. You won't regret it!
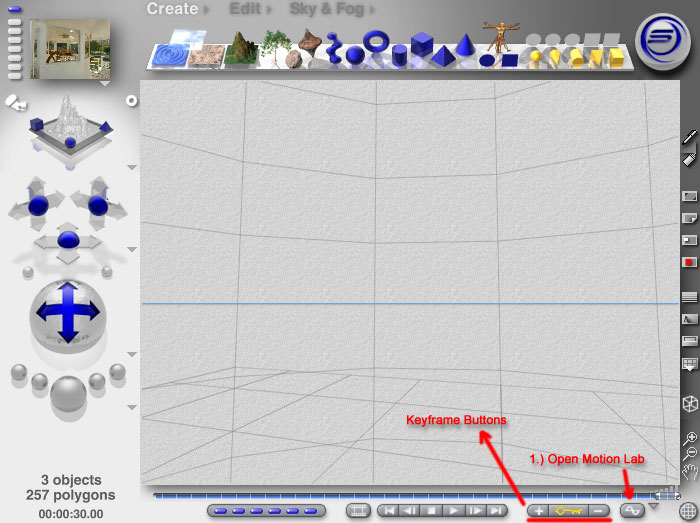
Also, i suggest to
switch off the "Auto-Key" function to have more control of your
keyframes. Click on the lower-rightmost button to switch the
Time/Selection palette. There is now a small triangle left of the
button you pressed. Clicking on the triangle will open a menu where
you can switch off Auto-Keying.Keyframes:
Keyframes will memorize a certain state of your scenery at a certain
time.
The best way to use keyframes is, to move the slider to a certain
time (or frame) in your movie, set rotation, FOV etc. of your camera
and add a new keyframe.
- Before doing anything else, you should now save your first
keyframe. You have a button with a key-symbol on your Time-Palette
with +/- buttons. "+" will add a keyframe memorizing the current
scenery setup - and turn the key from grey to yellow.
|
Smooting the movement:
It would look a litte unnatural if we use a linear movement from
keyframe to keyframe. So we will smoothen the camera movement -
especially around the keyframes (where we would have an abrupt
change of rotation, FOV...) |
Don't care about Sky and Sun here. The only thing we need is the
Camera.
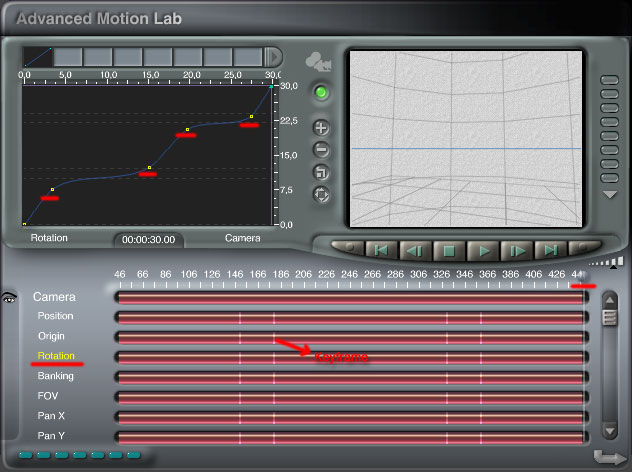
Click on the camera. It will open the camera movement subcategories
where we can smoothen rotation, FOV change etc.In the upper area
of the category display you can see a slider. Drag it around and you
will notice small white lines in the colored bars. These are your
keyframes. Most likely you will want to smoothen changes around
these keyframes.
I will now show you an example to smoothen the rotation of the
camera:
Click on "Rotation" (it will turn yellow). A small (at the moment
linear) curve appears. The dotted horizontal lines are best
understood as "changes" in your movement. Dragging the slider above
the colored bars again to move the crosshair and learn about the
correlation of the keyframes, the dotted lines and your movement
changes.
-> Every time the direction changes in my example, the change is
abrupt. So, what i do is simply flatten the curve before and after
the keyframes. This slows down movement at will look more natural.
In the following screenshot the relevant information is underlined: |
| Finished? Ok - go back to the main screen. Again - in the
lower area of the screen you will find a small symbol, representing
a piece of film. This is the preview-button. You can create a small
preview of your animation and look if everything works as expected.If everything is OK, you can now render your animation. This is done by selecting the "File"-Menu and "Render Animation...".
Select the desired format and render your animation to disk. It's
now time for a short (or longer) coffee-break.... |
|