- Many photographers use external disks
for storing away their large amount of images.
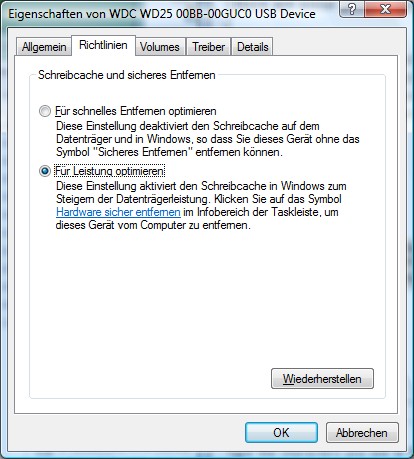
By default, such disks use a secure access mode with caching
disabled.
Enabling the cache will speed up things dramatically:
Open the Windows Start Menu. In the input field type "devmgmt.msc"
and press [Enter]:
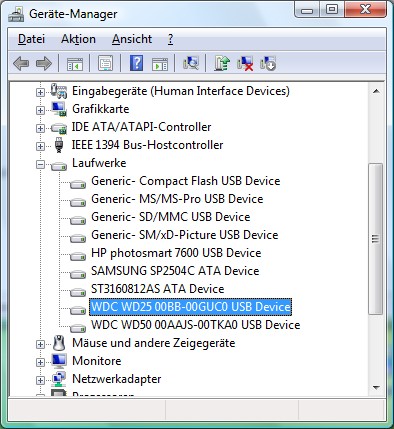
Select your drive, double-click to open properties. Enable
write cache:
- Vista only: is also a good idea
to disable "ReadyBoost" and "Superfetch". Both Services
will try to optimize speed by pre-loading Applications to
your RAM which doesn't make much sense when using memory-hungry
applications.
Open the Windows Start Menu. In the input field enter "services.msc"
and press [Enter]:
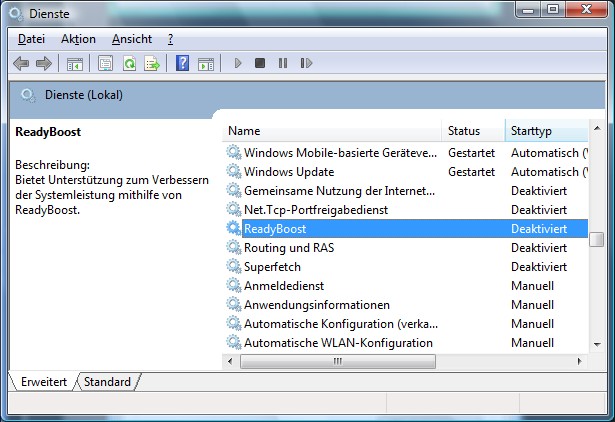
Double-click to open the properties and set the services
to "Disabled"
- Do you have more than one local Harddisk?
f yes, you may enable swap file for all local harddisks
attached via IDE, ATA or SCSI (NOT the USB or Firewire devices).
Open the Windows Start Menu. In the input field enter "SystemPropertiesPerformance.exe"
and press [Enter]. Choose "Advanced" and press "Change"
for the Virtual Memory options:
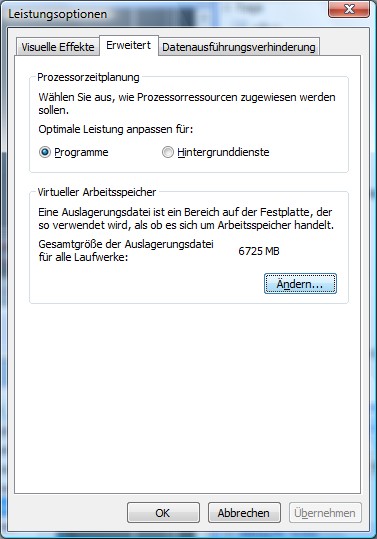 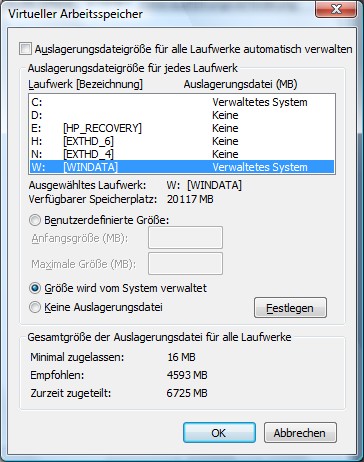
Here you can add the local attached drives.
- Antivirus:
Most Antivirus Products will also scan image files during
on-access scanning:
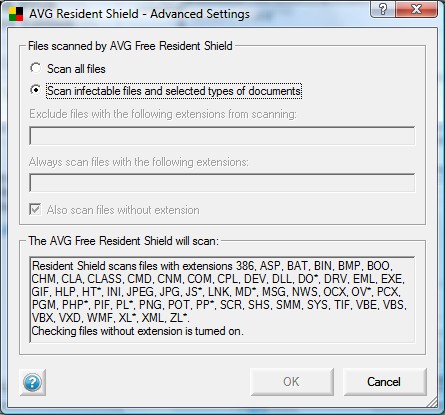
During stitching, disable scan of image files or disable
on-access scanning at all:
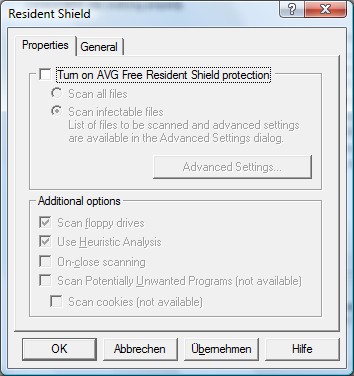
Don't forget to turn it on after you're finished!
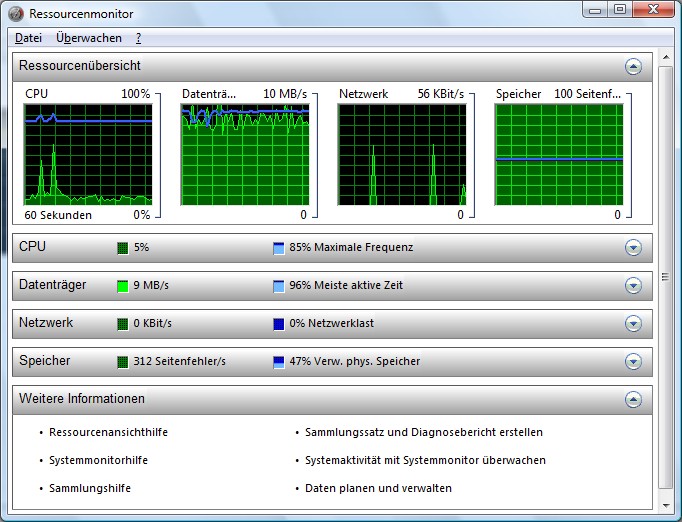
- There are also a bunch of other specific
things to optimize. Run "perfmon.exe" during stitching to
observe potential bottlenecks in your system.
Here you can see an non-optimal stitcher run in PTGui with
the source images stored on an external USB hard disk. As
you can see, only 5% of your CPU are used and 9MB/sec transferred
from/to your harddisk - but 96% of your computer's
time are spent waiting for pending disk operations.
So, as long as you won't use a faster harddisk, all other
optimisations are in vain...
|